Wednesday, December 13, 2017

My Papertrey Ink December Products

Hello folks! Hope you are enjoying the happiness and madness of the holidays in your neck of the woods. We're taking it real easy around here...probably the best gift of all. LOL! But before I kick back with a  cup of  spiked cocoa, fuzzy socks, and a good book (I really need to put together a list for the blog of my favorite books this year), I've got two dies coming out with Papertrey Ink this month. One is a great year-around way to packing up some goodies with a pantry staple and another is a fun way to add a little love to your Valentine's Day projects. 


Here's a glimpse of both of the new dies-Arrow Maker Dies and the Paper Sack Closure. Let me tell ya, the Paper Sack Closure die is going to be permanently on your desk, as it is on mine. And so reasonably priced as well, you won't even believe it. 

The Paper Sack Closure Die takes your standard paper bag and adds the opening and slot to create a closure. You fold the top of the bag and a thin stick of some sort is threaded through the slot and opening, holding the sack closed.


Treat sticks work really well for keeping the paper sacks closed using Paper Sack Closure Die. They are readily available, inexpensive, and you can cut most of them down to your desired length with a pair of scissors. I actually really like the option of a wooden dowel that is between 1/4"-3/16" in diameter. It's the classiest option in my opinion, but keep in mind that it will add an extra step if you have to cut it down with a small saw or similar shop tool. 


It was originally designed to create this closing feature on your average lunch sack. They totally fit through your standard cutting machine. You position the die with the edge of the die at the top of the bag and the hole toward the middle. Just run it through and viola!


Next, fill your bag with goodies, fold between the two features created by the die, and use a stick such as a dowel, treat stick, or popsicle stick to thread it through the back and hold the bag closed. 


You can use various sized treat sacks (these blue ones are slightly smaller than the lunch sacks) by adjusting where you cut the die features. On this blue sac, I positioned the die so an inch or so of the die backing was above the sack when it went through the die cut machine.


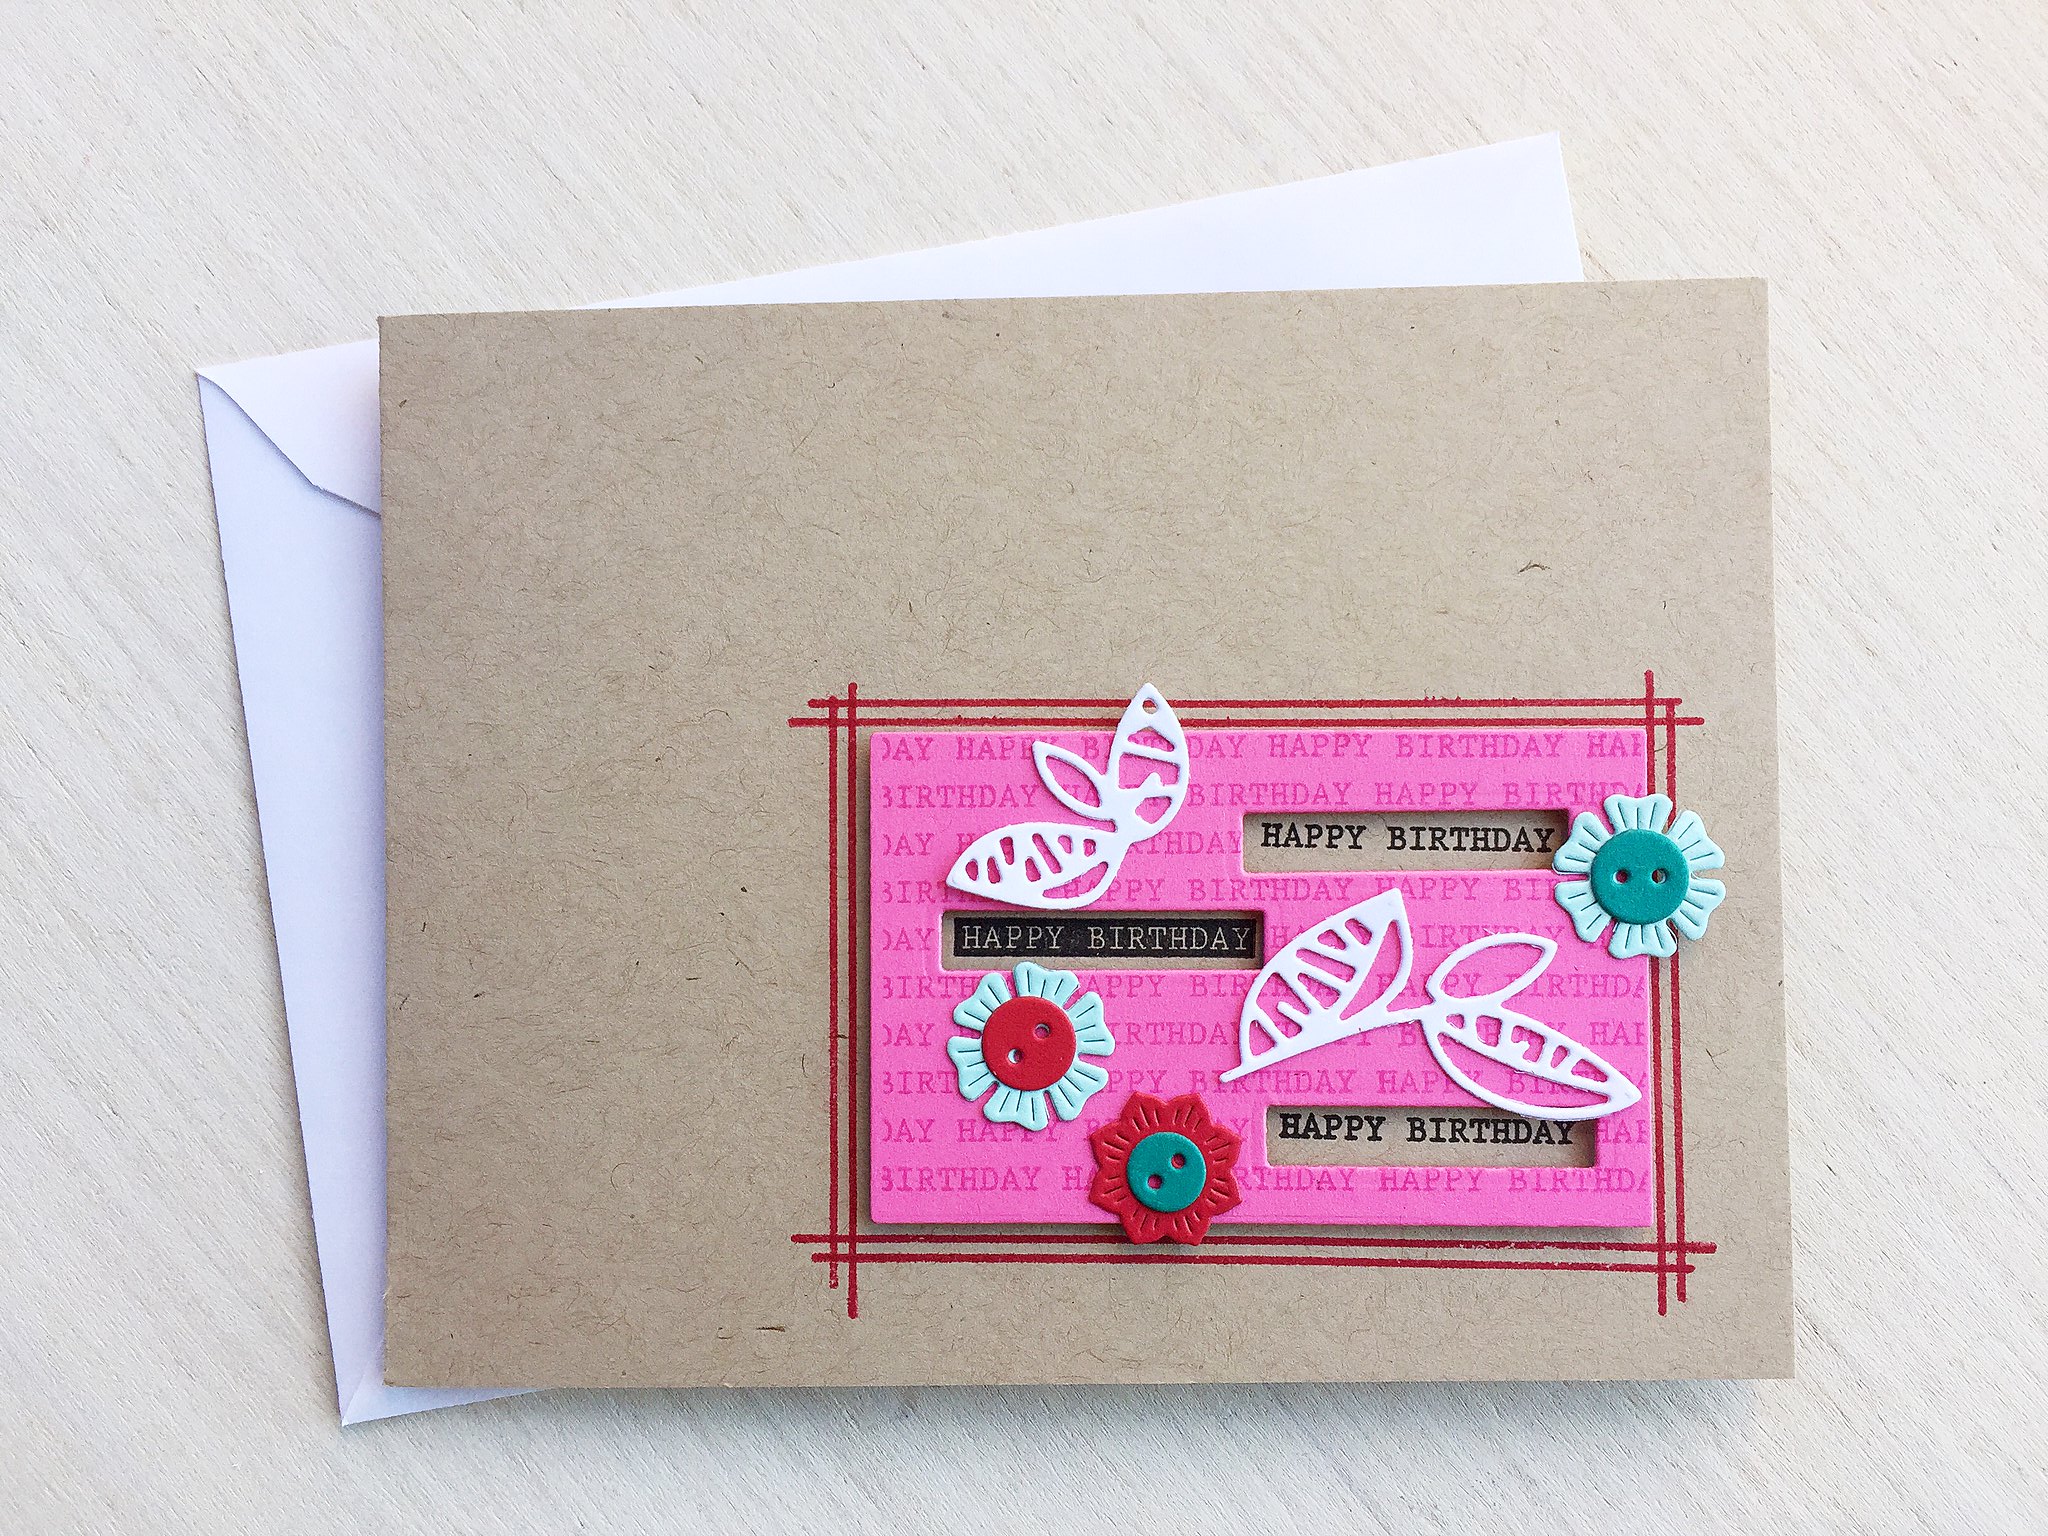
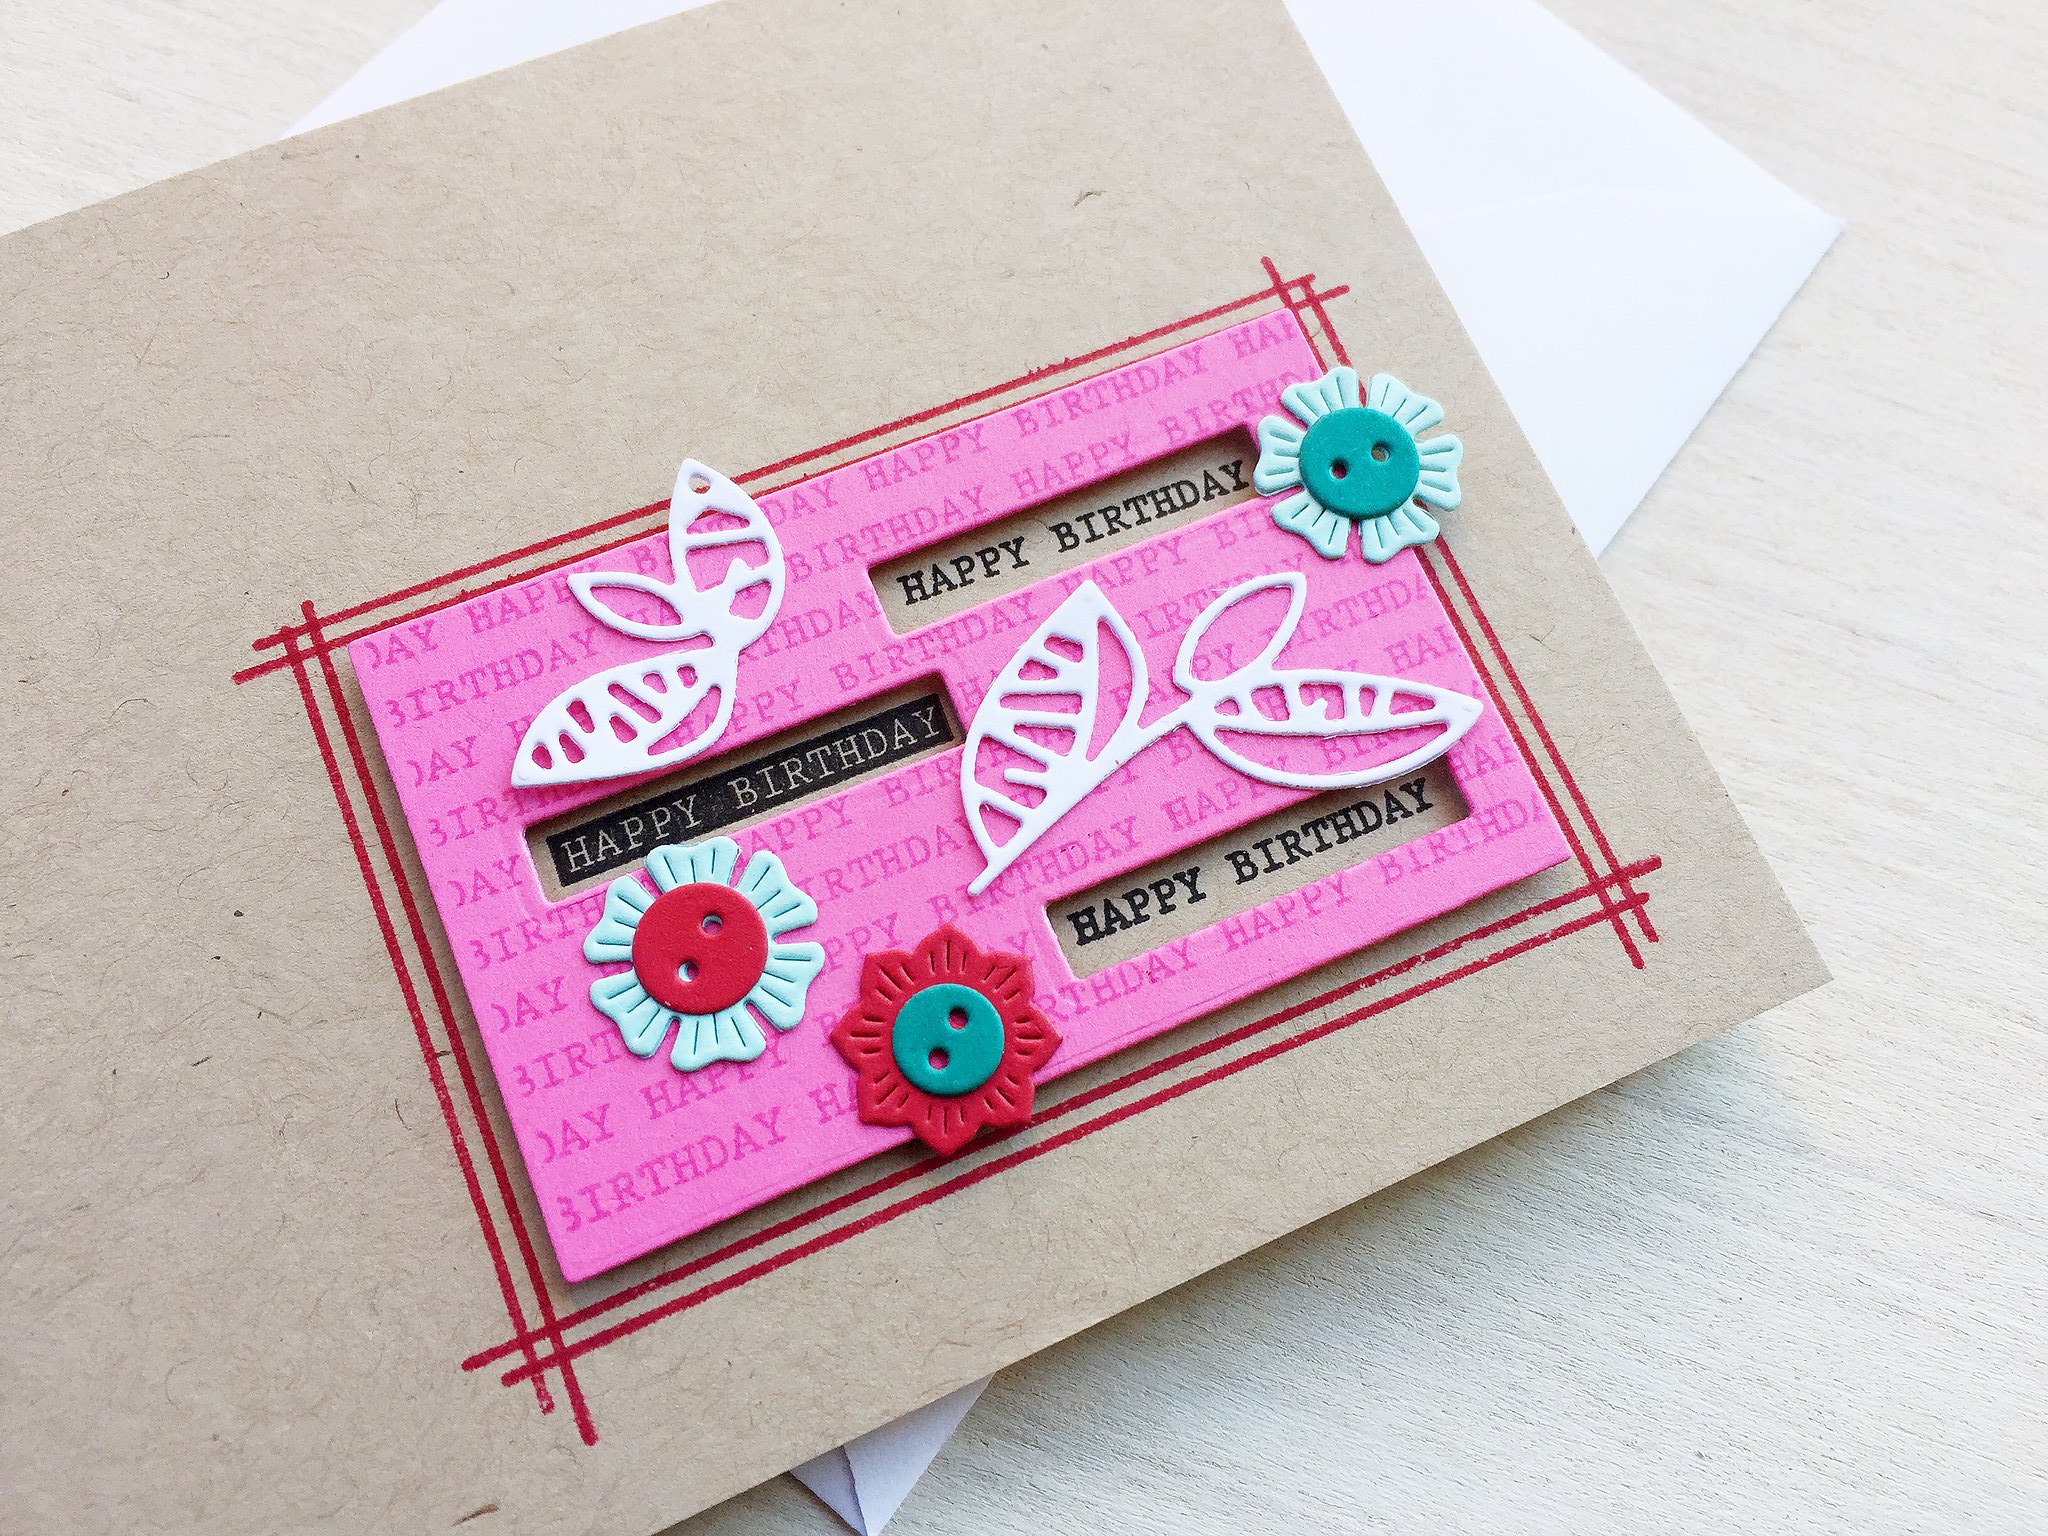
You can use various dies in your collection to add a feature to the front of your project. You just to selectively cut the Paper Sack Closure Die on the element you want to add like this..


The opening in the white element was matched up with the opening on the sack. The sack was folded and the slot on the back fold of the sack was was pushed through the opening, holding the bag closed with a popsicle stick. 


In keeping with the Valentine's Day theme, the Arrow Maker Dies turn the stick of your choice used with the Paper Sack Closure Die into an arrow. 


The arrow fletching (yep...had to look that up...we've all learned something today) is made up of two dies. I cut them in different colors and added them to a popsicle stick so you can visualize how the two layers "lock" together on your project.


The arrowhead die is folded in half and features the same "lock together" design. The stick of choice is woven between the front and back of the arrowhead.

In addition to using the Arrow Maker Dies with the Paper Sack Closure Die, they look cute on a card and are relatively flat for mailing, no thicker than a popsicle stick. Added bonus, you can stamp a message right on the wood of the arrow. Sweet.

That's it for me this month. Hope you like what you see. Both dies will be available December 15 at 10 PM EST  at www.papertreyink.com

Have a lovely holiday! 

Wednesday, November 15, 2017

November 2017 Papertrey Ink Stitched Ornaments

Ring, ring, ring...is this thing on? Hi friends! It’s been awhile. Hope ya’ll are doing good. Fine here. Been a busy mom, wife, sister, and friend over the last eleven months. Just doing my thing and taking a much needed deep breath.  All planned, mind you. And I knew, heading into this break, that I wanted to return with felt Christmas ornaments. It just didn’t feel right for my tree to go up this year without a new addition or two. Hope you feel the same.

Before we start, please forgive me if there are any mistakes here. I'm more than a bit rusty with this whole blogging thing. 


With that being said, let me introduce you to the Stitched Large Snowman, Stitched Gingerbread House, and Stitched Primitive Star. All will be available for purchase at now at  Papertrey Ink.


The Stitched Gingerbread House is as cute as they come. Lots of little details add all the charm you could want. And it looks great with last year's Stitched Gingerbread Basic, Gingerbread Mister, and Gingerbread Miss.


I want to highlight a few of the stitched details on this one. I'll be posting a stitching guide for this ornament at the end of this blog post. The center window has the outermost "window sill" stitched off the window and onto the main part of the house.

The side windows feature the same stitch detail on the "window sills", only they are stitched into the "window shutters". 

Next up, the Stitched Large Snowman. If you remember, there is a smaller Stitched Snowman Die that is used mostly to add a snowman detail to a larger project. This one stands on its own to use as an ornament. 


 I used mini brads for the eyes. Black beads can be used as well. There is a scarf die that is included in this set. That is intended to be used by wrapping around the stuffed snowman and tied at the neck.


The top hat is intended to be a separate element, so you have the option of not using it. Just leave the bottom open and slip over the head of the snowman.


When I went to tie the string on my little guy to use him as an ornament, I sewed through two of the stitch holes on the back of the hat and into the back of the snowman, securing the hat in place. Two birds, one stone and all that. 


And lastly, for those of you who want a simple and quick option this holiday, we've got the Stitched Primitive Star. This is a great companion to the previously released Stitched Primitive Heart. I think they would look adorable in a banner together.

Here, I pulled out some additional dies to add a mini banner across that fun star. Using the Stitched Banner Dies and the Tiny Stitched Alphabet dies, you can string three, four, and even five letter words across the Stitched Primitive Star for a whole collection of ornaments. Check out the Stitched Holiday Word set for additional inspiration...the words on those dies are no longer than five letters. 

Here are the stitching diagrams for the Stitched Gingerbread House.


Tuesday, December 13, 2016

Take It Easy Group Post Day at Papertrey Ink

Welcome back! It's always a treat when the Papertrey Ink girls feature some of your new products on a group post day. An extra special treat, it is. I can't wait to see what the girls all do with my new Take It Easy stamps and dies, Cozy Bed Dies, and Tissue Cover Dies in the get well ensembles they'll be creating. 

Take It Easy Stamps and Dies, Pretty Cover Plate, and Tissue Cover Dies by Papertrey Ink

I have a sweet little combo to share myself. I used elements from Take It Easy. The pajamas I stamped on Hibiscus Burst cardstock and did an easy and light coloring treatment with Copics. You'll notice that there are plain pajama bottoms. They actually match up with a plain top for the guys. (The buttons even go in the other direction.) The plain bottoms can go well with the feminine top as well, for another option. 

Check out the sentiment. It hits the right note for when you are taking care of a loved one. It fits nicely in the bottom section of the Delightful Cover Plate.

And check out the Tissue Cover Die. I've been wanting one of these forever! You take your basic travel size tissue pack and fancy it up a bit. Just the right thing for a friend or family member who is under the weather. I stamped it repeatedly with Keep It Simple: Sending Hugs. 

Tissue Cover Dies by Papertrey Ink cover the travel tissue packs by Kleenex

Just a visual to show you which tissues fit inside the box created by the new Tissue Cover Die. I recommend taking them out of their plastic wrapping before you box them up. These are something that are really inexpensive and can be picked up anywhere. This is a nice way to express sympathy with a small gesture that means a whole lot to the recipient.

Take It Easy stamps and Dies by Papertrey Ink, laughter is the best medicine

And before I go, a close up at my newspaper headline. Snicker. Word! Only my problem is that I don't need to be sick to fall into this specific trap. 

Thanks for joining me. Check out a plethora of inspiration at Nichole's blog. And all these feel better products from me (Tissue Cover Die, Take It Easy stamps and dies, and Cozy Bed Dies) will be available on December 15 at 10 PM EST at www.papertreyink.com


Sunday, December 11, 2016

Take It Easy for Papertrey Ink

Hey Everybody! I hope the holiday season is treating you well and you are enjoying making memories with your loved ones all month long. And that when you take a little breather from that, you are indulging in lots of craft projects! Such a fun time of year.

I've got a new stamp set and a few dies to coordinate this month for the December Papertrey Ink release. I'm here to show you the first card I made with Take It Easy. It's all about staying in bed and taking it easy. That could be for a whole variety of reasons. And, of course, there's a humorous element to it all as well because it isn't something I can resist doing. After all, laughter is the best medicine.

Take It Easy Stamp Set and Cozy Bed Dies by Papertrey Ink

 Here you have the Take Easy stamps and die set. This set was illustrated at the same time as Sweet Dreams, so they have the same style and they can work together if you wish. You have this little scene laid out on a the new Cozy Bed Dies. Makes you want to cuddle on in, doesn't it? It does for me!

Take It Easy Stamp Set and Cozy Bed Dies by Papertrey Ink

People often read the paper in bed on a lazy Sunday morning. (Let's all pretend we do that with an actual newspaper still instead of a tablet.) This is were all the humor comes in. The top story headline is added in and can be switched out. So there are several stories that you can choose to match up with your card's sentiment. Fun, right? This one might be my favorite. 

Take It Easy and Cozy Bed Dies will be available soon at www.papertreyink.com. The release goes live at 10 PM EST on December 15th. I'll be back more this week with more cards. Thanks for taking a little time out of your busy holiday schedule to pop on in. 


Sunday, November 13, 2016

Another Fill In the Blank Card

I wanted to pop in here today with a card that focuses on the frame elements of my new November Papertrey Ink stamp set and dies, Fill in the Blank. They can add the perfect finishing touch to a front card panel on just about any project.

Fill the Blank stamps by Papertrey Ink

The key in creating the frame is to place your main panel on your card and then stamp the lines around it. The edges of the panel act as your guide for easy placement. 

I always envisioned using Oopsie Daisy with this set. A fun floral element is always the right touch.

Thanks for joining me. Fill in the Blank stamps and dies will be available on November 15th at 10 PM EST at www.papertreyink.com. Have a nice Thanksgiving!

Saturday, November 12, 2016

More Fill in the Blank

Hello Papertrey Ink friends. I'm back with two more cards featuring my stamp set for the November Release, Fill in the Blank.

This time I'm showing a feature you haven't seen in any of the examples. In addition to the three large text blocks and their corresponding single phrase stamps that help you "fill in the blank" (just because, happy birthday, and thank you), there are three additional sentiment stamps that coordinate. They feature the same font and spacing as the text blocks, so they can seamlessly blend. Let me show you what I mean.

Fill in the Blank stamps and dies by Papertrey Ink

On this card, I stamped the large "happy birthday" text block twice in Stormy Seas ink. I "filled in the blank" with the single "happy birthday" stamp in the same color ink, so it looks like a solid background now. The additional sentiment that matches "happy birthday" is "thinking of you today & always". I stamped that in True Black on Aqua Mist cardstock and added that to my card along with the lovely cup from What the Doodle: Teacup

Fill in the Blank stamps and dies by Papertrey Ink

How about another example? I stamped the large "thank you" text block three times on my Lovely Lady cardstock panel. The text blocks tile beautifully in a vertical orientation, one stacked on top of the other. (I want to mention that they do not tile horizontal. I find that the size they come in is sufficient for so many applications, that I don't feel limited by the lack of horizontal tiling.) I stamped the single "thank you" in the same color ink to "fill in the blank" like I did on the teacup card, for a solid background look. 

Fill In the Blank stamps and dies by Papertrey Ink

I pulled out an old favorite with Strawberry Patch and added that lovely vine of berries to my card. The coordinating sentiment for "thank you" is "you are so sweet". I stamped that in Pure Poppy on Lovely Lady cardstock and die cut it with the coordinating die. This got popped on top of the strawberries as a focal point sentiment. Easy. 

I hope you like what you see. I'm really enjoying this stamp set a lot! I'll be making a few more cards for tomorrow. Stop by and see. And if you like what you see, Fill in the Blank stamps and dies will be available at www.papertreyink.com at 10 PM EST to purchase. Thanks for stopping by.


Friday, November 11, 2016

Fill in the Blank for November

Hiya! Stopping by to see some Fill in the Blank stamp and die projects for the November Papertrey Ink release? You've come to the right place. Let me show you some ways to use this great new basic.

Fill in the Blank stamps and dies by Papertrey Ink  

Fill in the Blank consists of three rectangular text backgrounds with the main word removed in the lower right corner. The stamp set comes with single phrases to "fill in the blank" of the text box. The results are you can create a background with a colored focal point like I did on this card. The larger text background was stamped in Hawaiian Shores and the single "fill in the blank" was stamped in Olive Twist. I used Bloomin' Cute stamps and dies to surround my focal point sentiment. 

Also included in the stamp set are some frame elements that help you fancy up the edges of your text blocks. With the coordinating dies, you get a great card elements that can be used for so many projects. 

Fill in the Blank stamp set and dies by Papertrey Ink

The dies include a single rectangle that perfertly fits the text blocks and five small rectangles that can be used on the single lined sentiments. Here I stamped a single "happy birthday" text block on a rectangle die cut and used the small rectangle die that fits the "happy birthday" sentiment to die cut three spaces out of the background text. The single lined sentiments were stamped on the card base to show through the die cut openings.

Fill in the Blank by Papertrey Ink

I elevated the panel on foam tape for dimension. Really fun window effect. And I used the frame elements to finish off the project. 

This is certainly a fun and adaptable stamp set. I have a list of ideas as long as my arm. Be back tomorrow with some more. 

You can add Fill in the Blank stamps and dies to your collection on November 15th, 2016 at www.papertreyink.com. Can't wait to see your creations if you decide to pick them up.